Posts

Fuel Tank

Image
The Fuel Tank Within this assignment, we worked in groups to create seperate components of a full sized full tank. We utilised programs and technologies such as slicer and laser cutting to create a mould for the tank. We then used this base to model each piece, ensuring that they were as accurate as possible. See below for what techniques our group implemented to complete the necessary pieces of the tank. 3D Model There are various techniques to get a 3d model of a fuel tank for this project. The first is to take photos of a fuel tank of all angles to then put into the software Recap, by Autodesk, to reconstruct into a virtual 3D model. Second, is to measure the fuel tank and select from a variety of 3D CAD software to then model the tank. Third, is to find a pre-existing 3D model fuel tank online and use this as your base model. We measured out the fuel tank and used 3D modelling software Rhino/Grasshopper to construct the tank virtually. From here we...

The Blister

Image
The Blister  The blister is simply the aluminium sheet beaten through the outline of a shape Two identical forms were cut on the CNC router and the sheet was placed securely between the two  The sheet was then hammered with mallets to form the blister shape  To shape the "sharper" end of the blister shape, a tool was fashioned out of wood that would better fit the unique shape of the blister See below the process of forming the blister
Image
The Torus The torus was one of the more complex projects.  The aim was to get the sheet two be shaped on two opposite planes One being the bend running the entire length of the sheet and the other running across the shorter width of the sheet  The gully shape running along the middle of the sheet was made by hitting it with a mallet. This created the initial bend in the sheet Following this the edges were rolled on the english wheel to shape it compress the metal and shape outer edges 

BEIL0014 - Bowl

Image
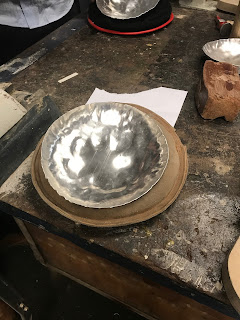
The Bowl  The bowl was the easiest of all the projects. The sheet was cut into a circle to allow us to shape the sheet into a bowl shape in the later stages The sheet was first hit on the outside on a stump to create the folded edge Following this, the middle sections were hit on a sand bag to hollow out the centre  Imperfections were hit out with mallets and then the bowl was rolled to flatten the bowl and provide a smoother finish